Let’s be honest — everyone’s talking about HubSpot lead routing these days.
“HubSpot does this, HubSpot automates that…” — but no one really talks about why it matters in the first place.
So, let’s cut to the chase.

If you’ve ever wondered why lead routing even started or why it’s such a big deal for sales teams, you’re in the right place.
Sure, lead routing in HubSpot is known for assigning leads to the right sales reps faster, but that’s just the surface.
There’s a lot more power beneath that automation.
Think about it: faster lead assignment is good, but smarter lead assignment is what actually boosts conversions and closes more deals.
That’s where HubSpot truly shines.
And here’s another truth: most salespeople know about lead scoring, but few know how to use it effectively, how to set it up, what rules to apply, or which logic actually works for their business.
This blog is here to simplify all that.
We’ll break down what HubSpot lead routing really does, why it’s crucial for your sales process, and how you can make the most out of it, with practical insights, not buzzwords.
Ready to see what really happens behind the “lead routing HubSpot” curtain?
Let’s dive in.
What Is HubSpot Lead Routing?
Lead routing is the process of assigning incoming leads to the right sales reps or teams. It makes sure every lead gets the attention it deserves quickly and efficiently without overwhelming your team.
HubSpot simplifies this with its built-in automation tools. Using workflows, you can route leads into the proper sales model based on criteria like geography, deal size, or lead score. For example:
- A high-value lead might go directly to a senior sales rep.
- Leads from a specific region can be routed to reps familiar with that market.
- HubSpot round-robin assignments guarantee an even distribution of leads across your team.
Automating these tasks, HubSpot helps businesses save time and focus on nurturing relationships and closing deals.
How HubSpot Lead Routing Works
HubSpot offers tools like automated lead routing that make sure leads are efficiently distributed across your sales team. Here’s how it works:
1. Define Triggers for Routing
Lead routing HubSpot workflows begin with a trigger, which is an event that adds a lead to the system. Common triggers include:
- Form submissions – For example, when someone fills out a “Request a Demo” form.
- Lifecycle stages – Automatically route leads as they move to marketing- or sales-qualified stages.
- Lead properties – Attributes like job title, industry, or company size that activate the routing process.
Triggers are essential for automatically assigning leads to workflows for faster processing and fewer delays.
2. Set Qualification Criteria
Not every lead is ready to be routed, and that’s where HubSpot’s If/Then branches come in. These allow you to qualify leads before account executives touch leads, making sure only high-value opportunities are routed.
For example, leads from companies with more than 50 employees can proceed to the sales team, while smaller leads are directed into a nurturing workflow for future engagement.
This can make your sales reps focus on high-value opportunities, saving time and resources.
3. Assign Leads to the Right Reps
Once leads are qualified, HubSpot provides several ways to distribute them among sales representatives:
- Round-robin assignments – Distribute leads evenly among available reps for fair workload distribution.
- Criteria-based routing – Assign leads based on predefined conditions like geography, industry, or deal value.
- Territory-based routine – Route leads to reps handling specific regions for personalized outreach.
For example, a lead from North America can be routed to a rep familiar with that market, while high-value leads might go directly to senior team members.
4. Automate Notifications and Follow-Up
After a lead is assigned, HubSpot creates tasks or sends notifications to the sales rep through email or Slack. This helps ensure timely follow-ups and reduces the risk of overlooked leads.
Automated reminders and task lists keep your team organized, focused, and ready to act.
5. Challenges With Complex Setups
While HubSpot simplifies lead routing, it does come with some limitations:
- Managing multiple workflows – Complex setups with overlapping criteria often require multiple nested workflows, which can be time-consuming to manage.
- Dynamic lead-to-account matching – HubSpot struggles to consistently reassign leads to the same account rep upon re-engagement, creating gaps in the customer experience.
- Limited transparency – There’s no centralized log to troubleshoot routing issues, making it harder to track why a lead wasn’t assigned.
These challenges can slow down your process, especially for businesses with advanced sales structures.
How to Set Up Lead Routing in HubSpot
Setting up HubSpot lead form routing might sound technical, but it’s actually straightforward once you understand the flow. Follow these simple steps to create a system that routes leads automatically — saving your team hours every week.
1. Go to Workflows → Create a New Workflow (Contacts-based)
Start by navigating to Automation → Workflows in your HubSpot dashboard.
Choose a Contacts-based workflow, since leads usually enter your system as contacts through forms or imports.
2. Add Enrollment Triggers
Decide when leads should enter your routing workflow.
Common triggers include:
- A form submission (e.g., “Request a Demo”)
- A lifecycle stage change (like MQL → SQL)
- A specific lead property, such as industry or region
These triggers determine which leads get routed and when.
3. Set Up If/Then Branches
Use If/Then branches to segment leads by criteria such as company size, region, or product interest.
For example:
If the company has more than 50 employees → send to the Enterprise Sales team.
If under 50 → send to the SMB team.
This logic ensures every lead lands in the right hands.
4. Assign Owner Automatically
HubSpot lets you automatically assign leads using two main options:
- Rotate Leads → Distribute evenly among your sales reps.
- Assign to Specific Owner → Send to a fixed rep or team (e.g., by region or product).
Choose the option that fits your team’s structure best.
5. Add Internal Notifications
Once assigned, keep your reps in the loop.
Add actions that send email or Slack notifications so salespeople are instantly alerted when a new lead arrives.
6. Test Your Workflow
Before publishing, test your workflow using a sample contact.
This step ensures your triggers, assignments, and notifications work as intended.
7. Monitor and Optimize
After launch, review your workflow’s performance regularly.
Check workflow history and assignment reports to spot gaps or delays, and adjust logic as your sales process evolves.
Now that you know how to build your routing workflow, let’s explore why this process can make or break your sales performance.
Why HubSpot Lead Routing Matters More Than You Think
Most people think lead routing Hubspot is just about getting leads to the right reps faster.
But here’s the truth: speed is only half the story.
The real magic happens when lead routing starts to improve lead quality, consistency, and conversions across your entire sales process.
1. Better Lead Quality
When routing rules are built on meaningful criteria, like industry, company size, or intent, your sales team starts each conversation with the right prospect.
Instead of chasing cold or mismatched leads, reps focus on those who are most likely to convert.
This saves time, reduces burnout, and creates a healthier pipeline.
2. More Consistency Across Teams
Without automated routing, manual handoffs can easily cause confusion — missed leads, duplicate ownership, or delayed follow-ups.
HubSpot eliminates that chaos by keeping assignments consistent and traceable.
Every new lead follows a clear, rules-based path, ensuring fair distribution and complete visibility into who owns what.
3. Faster Response, Higher Conversion
Studies show that contacting a lead within 5 minutes of inquiry can make you 9x more likely to convert.
HubSpot’s automation ensures your reps are instantly notified, helping them act when interest is at its peak.
No more leads sitting idle in someone’s inbox.
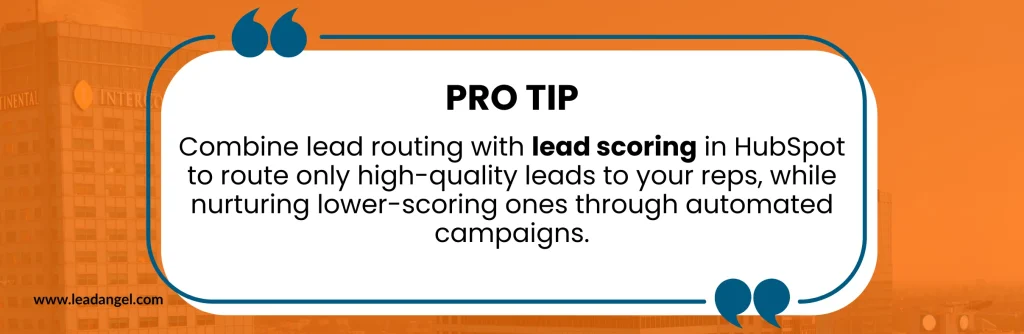
4. Smarter Prioritization With Lead Scoring
HubSpot’s lead routing becomes even more powerful when combined with lead scoring.
By ranking leads based on engagement, behavior, and fit, you can automatically route top scorers directly to sales — while nurturing lower scores through email sequences.
That means every lead gets the attention it deserves, at the right stage of readiness.
Still, even the smartest routing system has its limits — especially as your business scales. Let’s look at where HubSpot lead routing sometimes falls short.
Where HubSpot Lead Routing Often Falls Short
HubSpot is powerful when it comes to automating lead distribution — but like any system, it has its limitations.
As teams grow and lead volumes increase, these gaps become more noticeable. Here are some common areas where HubSpot lead routing can fall short:
1️ Complex Territory Routing Can Be Tricky
HubSpot’s workflows handle basic routing easily — like assigning leads based on country or round-robin logic.
But when your business expands across multiple territories, product lines, or sales teams, things can get complicated.
Setting up multi-level logic (e.g., “If region = North America and product = SaaS”) often requires multiple workflows or custom properties, which can become hard to manage and debug.
2️ Workflows May Break with Large Data Sets
When you’re dealing with thousands of leads, HubSpot workflows can slow down or misfire if conditions overlap or aren’t properly defined.
A missed field, duplicate record, or delayed trigger can send a lead to the wrong rep — or worse, no one at all.
This usually happens when businesses scale quickly without optimizing workflow logic.
3️ Limited Multi-Condition Routing (Industry + Region + Product)
HubSpot supports “If/Then” branching, but it’s not built for highly complex, multi-dimensional rules.
For example, if you want to assign leads based on region + industry + deal size + product type, it can quickly turn into a maze of conditions.
This limitation often forces teams to simplify their routing rules or use external tools for better control.
4️ CRM Sync Challenges with Salesforce
If you’re using both HubSpot and Salesforce, you’ve probably faced sync delays or ownership mismatches.
When routing rules differ between systems, a lead might be assigned in HubSpot but overwritten when synced to Salesforce.
This creates confusion for reps and slows down follow-up time — exactly what lead routing is meant to prevent.
One of the biggest challenges we’ve seen is territory-based HubSpot lead distribution — especially when your team grows or your markets expand. Let’s see how you can handle that inside HubSpot.
How to Assign Leads by Territory in HubSpot
Territory-based lead assignment is one of the smartest HubSpot lead routing best practices to ensure your sales team focuses on the right prospects.
Whether you divide leads by region, product, or business size — HubSpot makes it possible with a few smart configurations.
Here’s a simple, step-by-step approach:
Specify Your Territory Rules
Start by deciding how you want to split your leads.
It could be by:
- Geography (country, state, zip code, region)
- Industry (tech, finance, healthcare, etc.)
- Deal size or company size
- Product interest or lead source
Clearly defining these rules upfront ensures your workflows stay clean and predictable.
Create Custom Properties (If Needed)
HubSpot already has default fields such as “Country” or “Industry,” but if your routing depends on something more specific — like Sales Region or Account Tier — create a custom property.
This becomes the key condition for your routing workflow.
Build a Workflow for Territory Assignment
Head to Automation → Workflows in lead form routing HubSpot and create a new workflow (based on contacts or deals).
Use If/Then branches to assign ownership based on your territory logic.
For example:
- If Country = United States, assign to “North America Sales Team.”
- If Country = India, assign to “APAC Sales Team.”
You can even layer rules, such as Region + Product Type, by nesting conditions — just keep it organized with naming conventions.
Use Round-Robin HubSpot Assignment Within Territories
If you have multiple reps in the same region, add a round-robin action in your workflow.
This evenly distributes leads among team members in that territory — preventing overload and delays.
Test and Refine Regularly
Always test your workflow with sample data before going live.
Check if ownership updates correctly, syncs with Salesforce (if integrated), and reflects in reports.
As your team grows, revisit your territory logic to keep it aligned with your sales strategy.
How to automate your HubSpot lead routing with LeadAngel
Let’s be real — no single workflow fits every business. As your territories grow and teams expand, managing lead assignments in HubSpot can get messy.
That’s where LeadAngel steps in, automating complex routing with precision. From multi-condition logic to territory mapping and real-time routing logs, it keeps your workflows clean, transparent, and scalable.
Define your rules once, and let LeadAngel handle the rest. Smarter routing. Seamless workflows. Zero missed leads.
See How LeadAngel Can Transform Your Lead Management
Curious to experience the power of LeadAngel firsthand? We understand!
We're offering a complimentary trial so you can explore LeadAngel's features at your own pace. Once you request a free trial, we'll schedule a personalized onboarding session to ensure you maximize the value of LeadAngel.
Ready to take your lead management strategy to the next level? Request your LeadAngel trial today!
In addition to exploring the platform, we recommend visiting our LeadAngel Help Center for in-depth guidance. Our dedicated customer support team is also available to answer any questions you may have at sales@leadangel.com.
FAQs
HubSpot assigns leads automatically using workflows. You can distribute leads by round-robin, territory, or specific owner based on rules like region, company size, or lifecycle stage.
You manage leads through the CRM using lifecycle stages, lead scoring, and workflows. Leads can be tracked, qualified, and routed to sales reps for follow-up or moved to nurturing sequences.
Yes, HubSpot includes automated lead routing through its Workflow tool. You can set routing rules based on form submissions, contact properties, or deal criteria.
Lead form routing HubSpot assigns new leads automatically when someone fills out a form. It ensures inquiries go to the right sales rep instantly—reducing response time and preventing missed leads.
Yes, but it requires careful workflow setup. You can reassign leads by updating the “Owner” property, but to prevent overwriting, use filters or custom logic to only change ownership under certain conditions.
