Lead assignment should feel simple a lead comes in, it goes to the right person, and they follow up. But, assigning leads in Salesforce can turn into a puzzle of rules and logic.
What starts as a few basic rules can quickly turn into a long list of exceptions, workarounds, and manual fixes. If your teams spend more time managing rules than following up on newly created leads, it’s time to take a closer look.

In this blog, we’ll walk you through how Salesforce lead assignment works, where it falls short, and how to fix the mess before it slows you down.
What Is Salesforce Lead Assignment?
Lead assignment in Salesforce means deciding who gets each new lead. It’s the system that tells Salesforce, “Send this lead to Sam, not Jamie.”
The goal is to get leads generated from web forms, ads, or campaigns into the right hands as fast as possible so someone can follow up and start the conversation.
Salesforce uses lead assignment rules to do this. You set conditions like lead source, location, or industry, and Salesforce follows those to send each lead to the right person or queue.
It’s a simple system when you’re just starting. But as your team grows, those rules can get harder to manage.
How to Set Up Lead Assignments in Salesforce
Salesforce uses lead assignment rules to decide who gets each new lead. These rules follow basic if-then logic: if a condition is met, assign the lead to a specific person or queue.
Below is a step-by-step guide to help you set up a lead assignment in Salesforce.
Step 1: Log in to Salesforce
Head to your Salesforce account and sign in like you normally would.
Step 2: Open the Setup Menu
Click the gear icon at the top right of the screen, then choose Setup from the drop-down.
Step 3: Search for Lead Assignment Rules
In the Quick Find search bar on the left, type “Lead Assignment Rules.” Click the result under the Leads section.
Step 4: Start a New Assignment Rule
Click the New button to create your rule. Give it a clear name so you can find it later—like “Website Leads” or “US Region Routing.”
Step 5: Add Rule Entries
This is where you set the conditions that tell Salesforce how to route leads based on details like location, source, or industry. Think of it as telling Salesforce, “If this happens, send the lead here.”
For example:
- If State is Texas, assign to Riley
- If Industry is Education, assign to Maria
- If Lead Source is Web to Lead, assign to Devin.
- If Company Size is more than 1,000 employees, assign to the Enterprise Queue
Salesforce starts at the top and moves down. It uses the first rule that matches, then skips the rest. So it helps to list your most specific or high-priority rules first.
You can add as many entries as you need, but the more you stack, the harder it is to manage later. Keep it simple where you can.
Step 6: Choose a User or Queue
For each rule entry, pick where the lead should go. You can assign it to a specific rep or to a queue (a shared list other reps can pull from).
Step 7: (Optional) Set Up Email Alerts
Want reps to get a heads-up when they’re assigned a lead? You can link an email alert to each rule entry using a template. It’s optional but helpful if you want quick follow-ups.
Step 8: Activate the Rule
Head back to the main Lead Assignment Rules screen. Click Activate next to the rule you just created so Salesforce knows to use it.
Step 9: Test and Make Sure It Works
Before going live, test your rule with a few sample leads. Make sure each one goes to the right person or queue based on the rule entries. It’s a quick way to catch mistakes before real leads come in.
Why Lead Assignment in Salesforce Gets Complicated
Salesforce gives you the basics, but those basics don’t always hold up as your team grows. What starts as a few simple rules can quickly turn into something you need to babysit.
Here are some common issues teams run into:
- Too many rules to manage – As your team expands, you’ll need more rules for territory, lead source, product type, and rep coverage. This gets messy fast, and one small change can cause problems elsewhere.
- No round-robin or load balancing – Salesforce doesn’t offer a built-in way to distribute leads evenly. You’ll need extra tools or manual fixes to avoid overloading certain reps.
- No SLA checks or follow-up tracking – Leads get assigned, but Salesforce doesn’t check if someone follows up or how long it takes. That means good leads can sit untouched.
- Only works for leads – These Salesforce assignment rules only apply to leads. If you want to route contacts, accounts, or opportunities, you’re stuck doing it manually or using a different tool.
- Hard to manage SDR to AE handoffs – If your sales process includes multiple roles, like SDRs passing leads to AEs, Salesforce won’t handle that handoff logic on its own. You’ll need to build extra workflows or rely on spreadsheets.
If these sound familiar, you’re not alone. These are some of the same issues we hear from sales teams all the time.
What to Use When Salesforce Lead Assignment Isn’t Enough
If you’re struggling to deal with common challenges with Salesforce lead assignment, you’re not alone. Many growing sales and marketing teams start with Salesforce assignment logic but soon realize it takes too much time to manage and it still doesn’t cover everything.
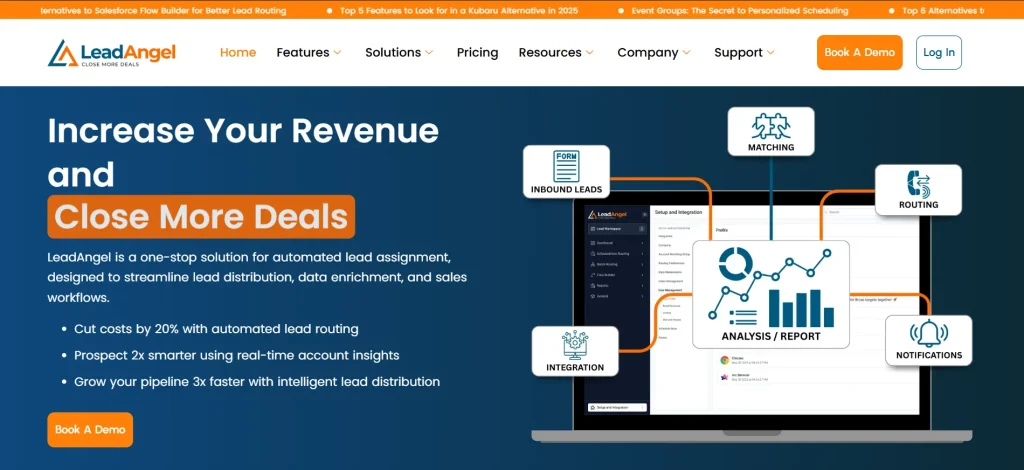
LeadAngel is built for this exact problem. It works alongside Salesforce to give you smarter, more flexible lead routing. You don’t need to rebuild your CRM setup or write complex logic. LeadAngel helps you assign leads more accurately, keep reps accountable, and make sure nothing is missed.
Here’s how LeadAngel helps solve the common issues:
- Flexible routing options – Assign leads using round robin, weighted logic, territory, or any custom rules your team needs. No need to hardcode conditions.
- Built-in SLA tracking – Automatically reassign leads if no one follows up in time. You can even set different response time rules by lead type.
- Support for all objects – Route not just leads, but also contacts, accounts, and opportunities.
- Role-based handoffs – Easily move leads between SDRs and AEs, or any other rep combination, based on where they are in the sales process.
- Real-time lead matching and cleanup – Match leads to the right accounts before assigning them. This avoids duplicates and keeps your data clean.
With LeadAngel, your lead assignment process gets faster, easier, and more reliable without all the rule rewrites.
Pricing Plans
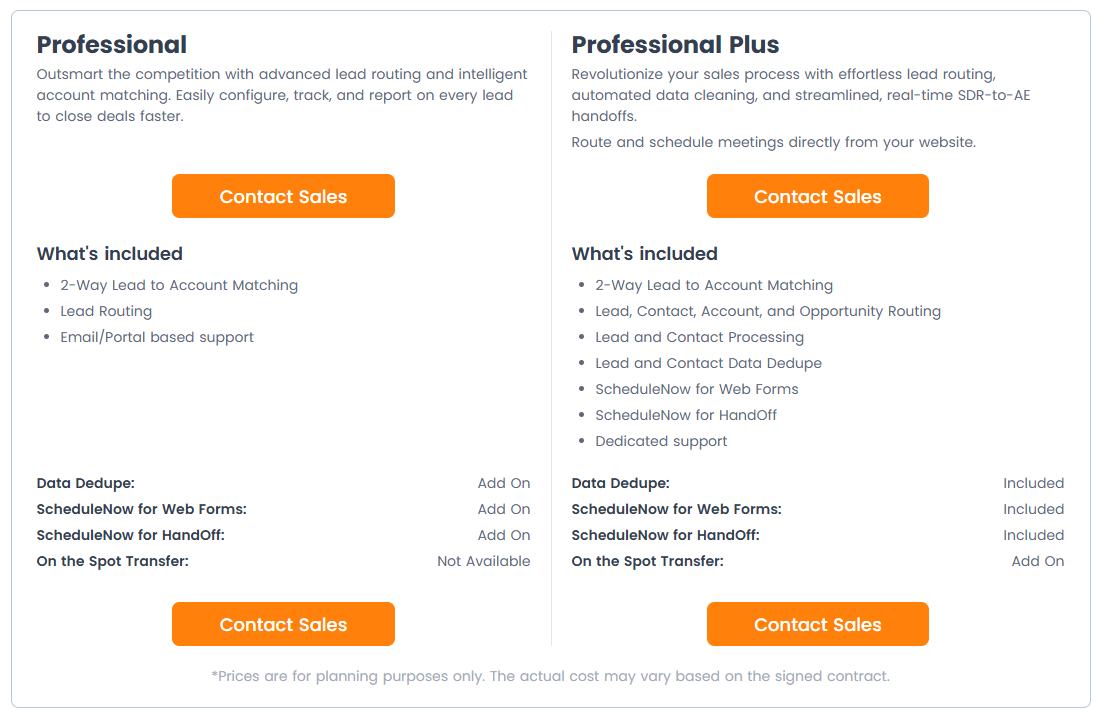
- Professional Plan – $500/month. Supports 100,000 lead and account records, 10 salespeople, lead-to-account matching, lead routing, and email-based support. Optional add-ons include data deduplication, ScheduleNow for web forms, and handoff scheduling.
- Professional Plus Plan – $2,042/month. Supports 500,000 lead records, 25 salespeople, advanced routing across leads, contacts, accounts, and opportunities, built-in data cleanup, scheduling tools, and dedicated support. Extra options like on-the-spot transfers are available.
Use the Price Calculator to estimate your total based on your team size and records. Sign up for free or book a demo with LeadAngel today!
Assign Leads Faster and Smarter With LeadAngel!
Assigning leads quickly and accurately is one of the most important steps in your sales process. Salesforce gives you a starting point, but when the rules get too complex or leads start slipping through, it’s time for a smarter solution.
LeadAngel takes the pressure off your team by automating lead routing, managing handoffs, and keeping your data clean. No more spreadsheets. No more missed follow-ups. Just leads going to the right people right on time.
Ready to start assigning leads more efficiently? Sign up for free or book a demo with LeadAngel today!
See How LeadAngel Can Transform Your Lead Management
Curious to experience the power of LeadAngel firsthand? We understand!
We're offering a complimentary trial so you can explore LeadAngel's features at your own pace. Once you request a free trial, we'll schedule a personalized onboarding session to ensure you maximize the value of LeadAngel.
Ready to take your lead management strategy to the next level? Request your LeadAngel trial today!
In addition to exploring the platform, we recommend visiting our LeadAngel Help Center for in-depth guidance. Our dedicated customer support team is also available to answer any questions you may have at sales@leadangel.com.
FAQs
Leads in Salesforce are assigned based on rules set by the business. When a new lead comes in, Salesforce checks the active lead assignment rule to see if any conditions match. If the lead matches a rule, it is sent to the right sales representative or team. If no Salesforce lead assignment rules apply, the lead stays unassigned until a lead owner is manually selected.
You can set up lead assignment rules in Salesforce by creating a new rule in Setup, adding rule entries based on lead details (like state or source), and choosing the rep or queue to assign leads.
Assigning leads means giving a lead to a specific salesperson or team. This makes sure the right person follows up and no leads go to waste. Businesses assign leads based on things like location, company size, or industry. The goal is to connect each lead with the best person to handle it.
You can mass-assign leads using the Lead List View. Select multiple leads, click “Change Owner,” and choose the right rep or queue. If you need to do this often, tools like LeadAngel can automate the process and assign leads based on custom rules, so your team doesn’t have to manage it manually.
Once a lead is assigned, the next steps depend on your lead management process. The assigned rep is responsible for following up, qualifying the lead, and starting the conversation. This is where nurturing leads begins building trust, understanding their needs, and moving them through the sales funnel.